-
投稿者検索結果
-
2022年6月30日 10:30 AM #107162
memime
閲覧者【お使いの Snow Monkey のバージョン】17.1.0
【お使いの Snow Monkey Blocks のバージョン】16.0.1
【お使いの Snow Monkey Editor のバージョン】8.0.1
【お使いのブラウザ】firefox
【当該サイトのURL】local### 実現したいこと
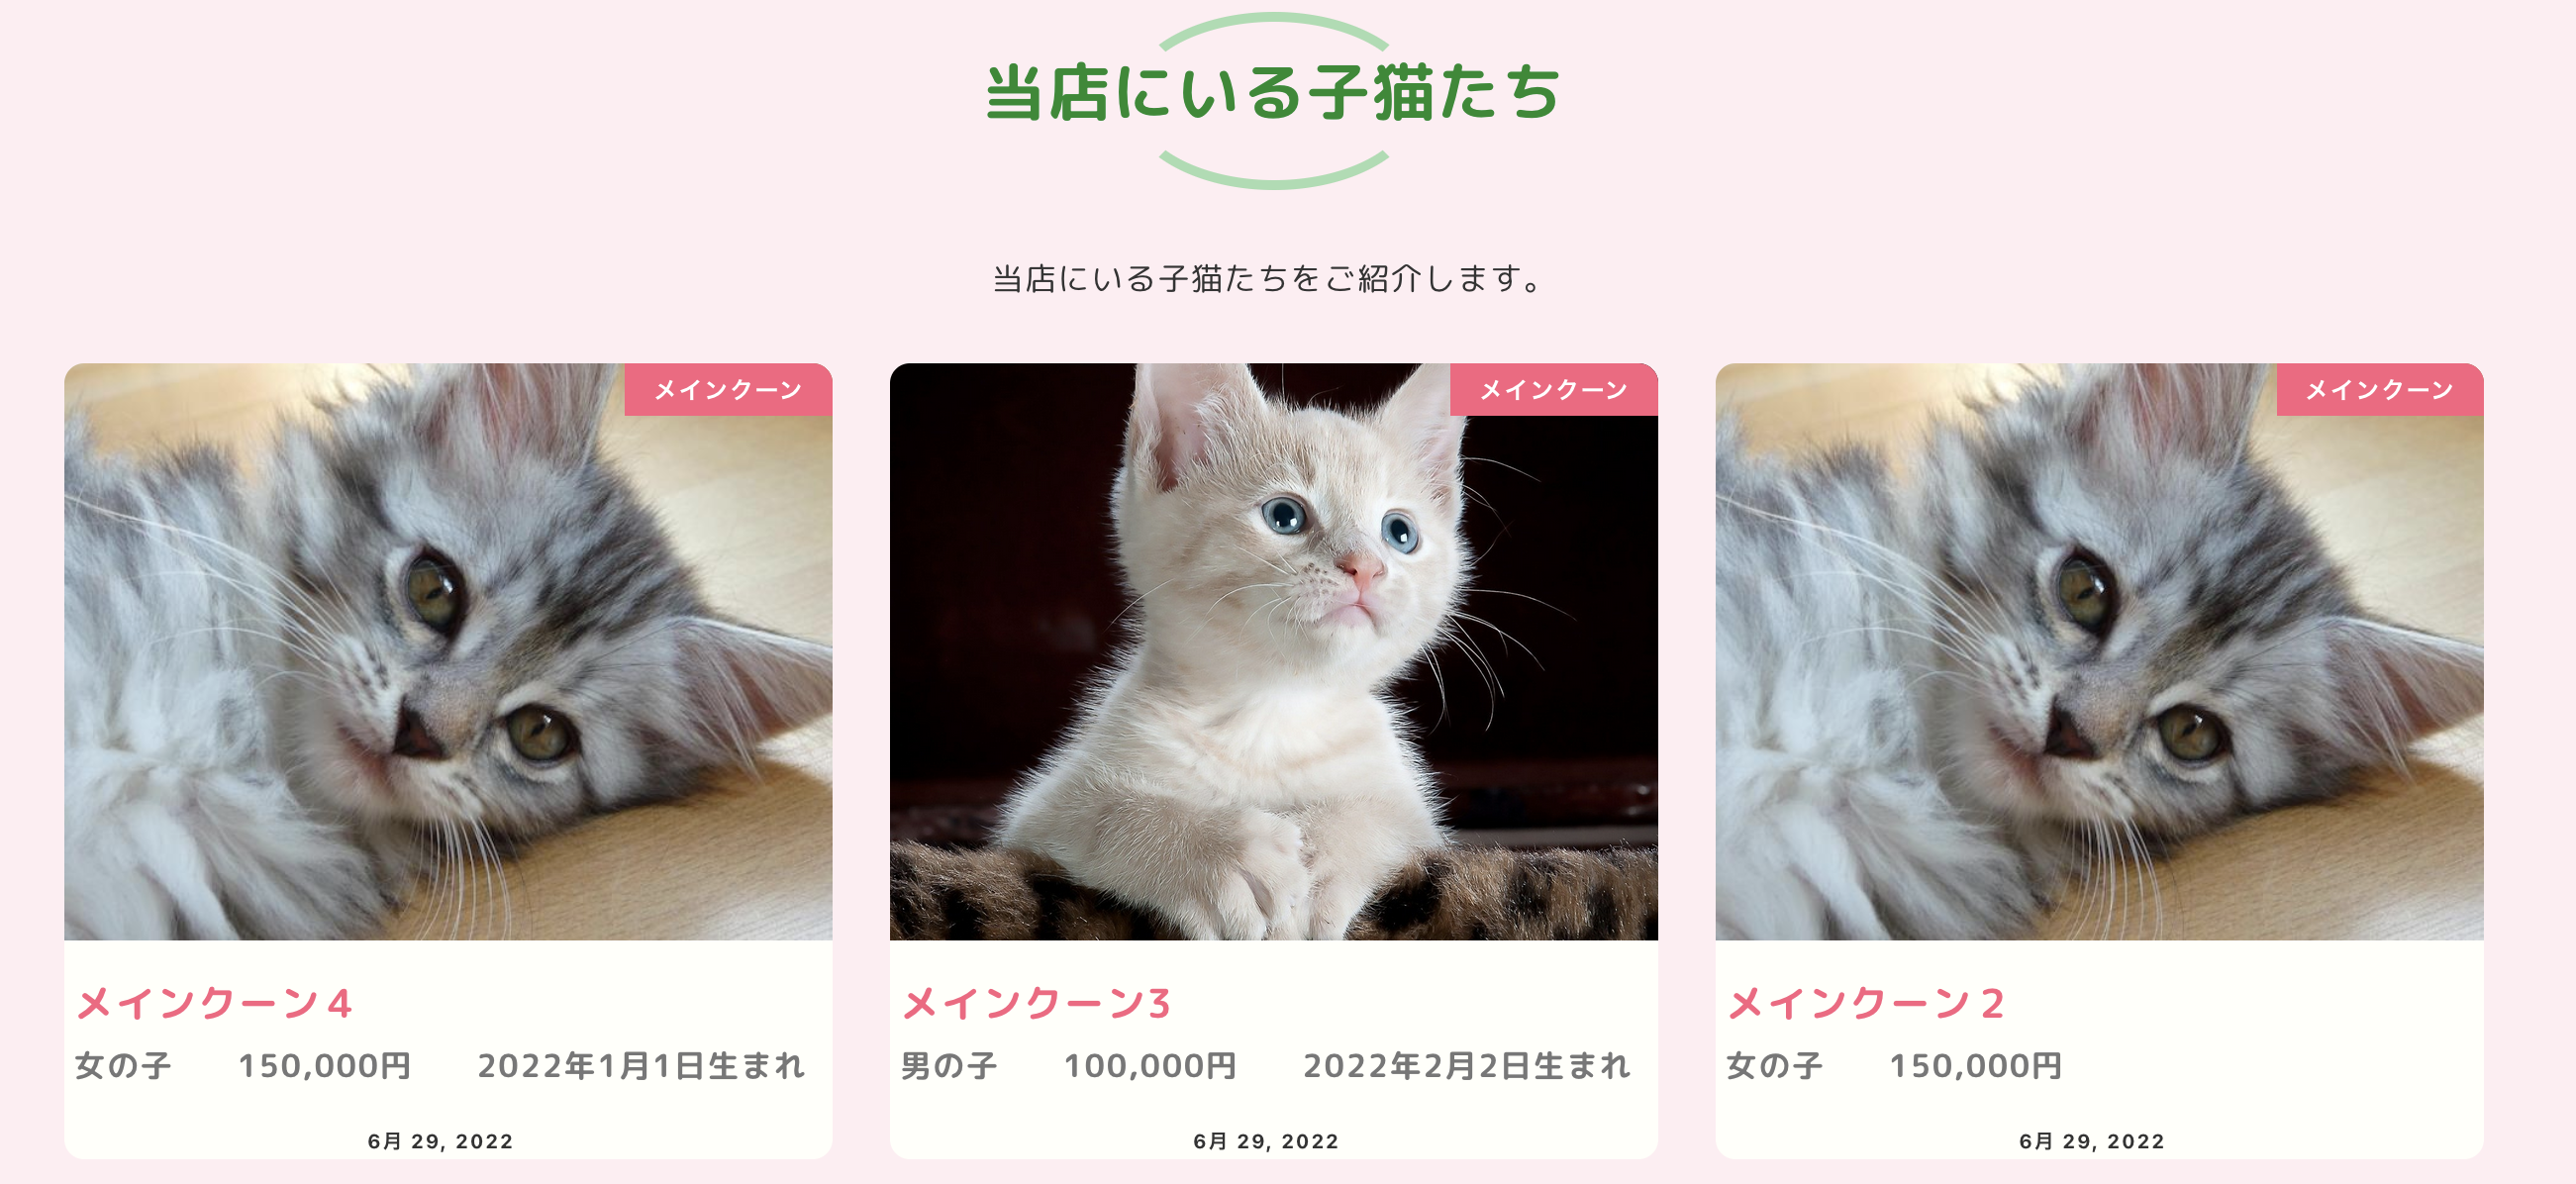
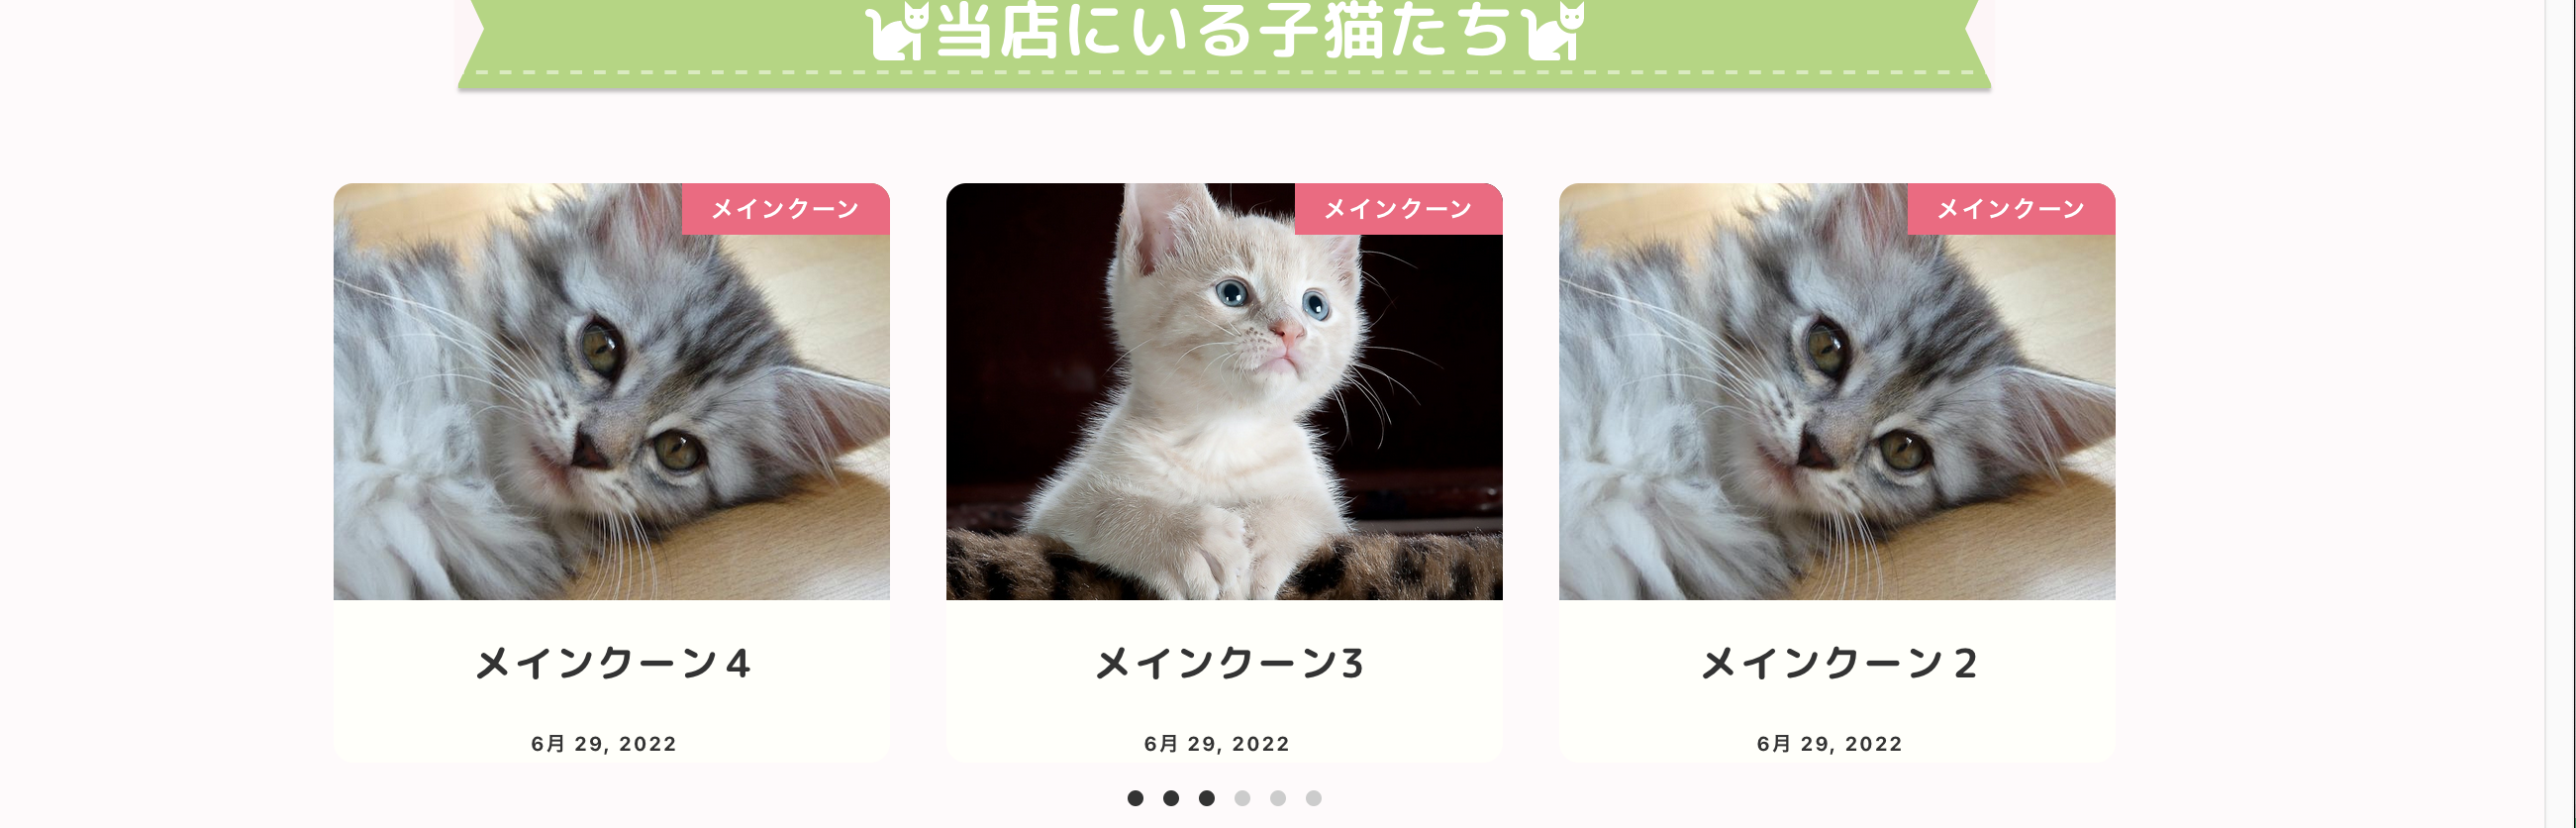
①任意のタクソノミーで表示されているc-entry-summary__title部分にカスタムフィールドを表示させたい。
②カスタム投稿のアーカイブページの横一列の表示数を3つから4つに変更したい。
できれば任意のタクソノミー投稿の表示数も3つから4つに変更したい。### 発生している問題
①カスタム投稿のアーカイブページではカスタムフィールドの出力が行えたが、任意のタクソノミーで表示されているパネル?には同じようにカスタムフィールドを表示させることができない。
②どこを弄っていいかわからない。
### 試したこと
/*カスタム投稿 */
add_filter(
	'snow_monkey_template_part_render_template-parts/loop/entry-summary/title/title',
	function ($html) {
		if (get_post_type('seles_cats')) {
			// カスタムフィールドで設定したフィールド名を代入
			$acf_year = get_field('sex');
			$acf_faculty = get_field('price');
			$acf_birthday = get_field('birthday');

			// テンプレートのh2タグの後に<div class='employee-info'>を追加
			$acf_employee_info = "</h2>
<div class='employee-info'>
<p>" . esc_attr($acf_year) . "</p>" .
"<p>" . esc_attr($acf_faculty) . "</p>" .
"<p>" . esc_attr($acf_birthday) . "</p>" .
"</div>";

			// テンプレートパーツのh2タグの後ろにdivタグを追加する
			$html = str_replace(
				'</h2>',
				$acf_employee_info,
				$html
			);
		}
		return $html;
	}
);
アーカイブの時は
is_post_type_archiveを指定することで表示できたので、ここをget_post_typeに変更したが表示されなかった。こちらも参考にしましたが、表示ができませんでした。
↓アーカイブページ
↓任意のタクソノミー表示
よろしくお願いします。
2022年4月7日 9:15 AM #102602返信が含まれるトピック: アーカイブページのタイトルを強制改行したい
add_filter(
	'snow_monkey_template_part_render_template-parts/loop/entry-summary/title/title',
	function( $html ) {
		if ( in_category( array('meat','sweets','other','bread','drink') ) ):
		ob_start();
		$title = get_the_title();
		if ( ! $title ) {
			return;
		}
		?>
		<h2 class="c-entry-summary__title">
			<?php
			echo wp_kses_post( $title );
			?>
		</h2>
		<?php
		$html = ob_get_clean();
		endif;
		return $html;
	}
);
を追加してみてください。
♥ 2Who liked: 2022年2月17日 10:04 PM #99267
返信が含まれるトピック: 任意のタクソノミーブロックで表示させた一覧の中に関連ページへ飛ぶリンクボタンを作りたい
オレインさんの記事を読みながら色々とやってみたらできそうです。
確認していただけますか?ただ、抜粋の長さに関わらずリンクボタンを右寄せにしたいのですが、イマイチできません。
そこだけお聞きしてもいいでしょうか?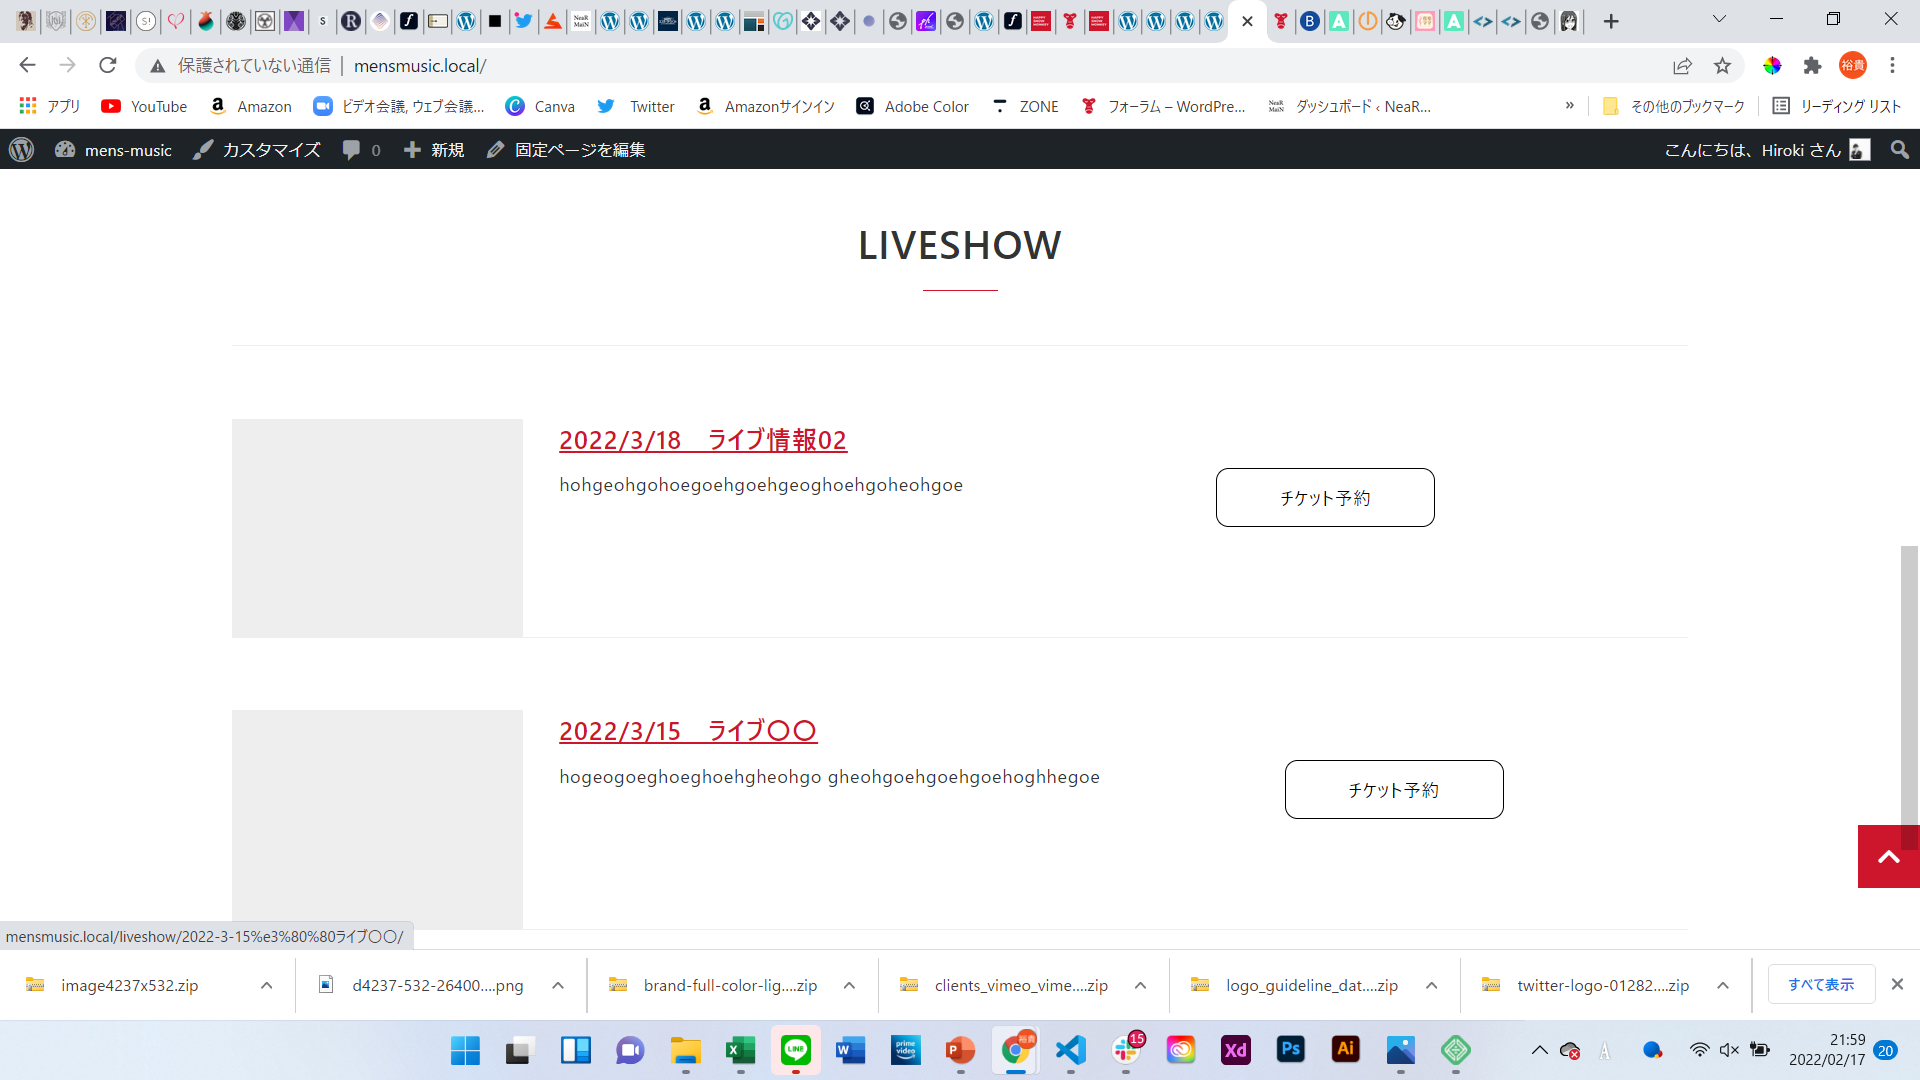
my-snow-monkey.php
add_filter(
	'snow_monkey_template_part_render_template-parts/loop/entry-summary/content/content',
	function ( $html ) {
		$acf_link = get_field( 'link' );

		$acf_reserve_link = "<div class="c-entry-summary__content">
<div class="reserve-link"><a class="reserve-btn" href="$acf_link" target="_blank" rel="noopener">チケット予約</a>";

		$html = str_replace(
			'<div class="c-entry-summary__content">',
			$acf_reserve_link,
			$html
		);
		return $html;
	}
);
css
.reserve-link {
  display:flex;
  flex-direction:row-reverse;
  justify-content:space-between;
}
.reserve-btn {
  border: 1px solid #000;
  padding:10px 50px;
  border-radius: 10px;
}
.reserve-link a {
  text-decoration:none;
  color: #000;
}
♥ 0Who liked: No user2021年10月13日 2:49 PM #89230返信が含まれるトピック: カスタム投稿一覧の表示方法と抜粋を非表示にしたい
ありがとうございます。
いただいたコードですが下記のようにするということでしょうか。これではカスタムフィールドも表示されませんでした。使い方が間違っていますでしょうか。
add_action(
'snow_monkey_get_template_part_template-parts/loop/entry-summary/content/content-{contract}',
function( $html ) {
if (get_post_type() === 'contract'): //カスタム投稿contractに限定する
// 以降の出力を変数に格納する
ob_start();
?>
<div class="contract-data">
<p>表示1:<?php echo esc_html (get_field('type')); ?></p>
<p>表示2:<?php echo esc_html (get_field('station')); ?></p>
<p>表示3:<?php echo esc_html (get_field('time')); ?></p>
</div>
<?php
// 変数に格納する
$type = ob_get_clean();
// </header>を書き換える
return str_replace(
'</header>',
'</header>'.$type,
$html
);
endif;
return $html;
}
);
♥ 0Who liked: No user2021年9月14日 4:33 PM #87131返信が含まれるトピック: アーカイブやサイドバーなどの日付に曜日を追加したい
以下を参考にしました。
add_filter(
	'snow_monkey_template_part_render',
	function( $html, $slug ) {
		if ( 'template-parts/loop/entry-summary/meta/meta' === $slug ) {
			return preg_replace(
'|
<ul>
 	<li class="c-meta__item c-meta__item--published">.*?</li>
</ul>
|ms',
'
<ul>
 	<li class="c-meta__item c-meta__item--modified">' . get_the_modified_time( get_option( 'date_format' ) ) . '</li>
</ul>
',
				$html
			);
		}
		return $html;
	},
	10,
	2
);
♥ 0Who liked: No user2021年9月14日 4:25 PM #87127返信が含まれるトピック: 任意のタクソノミー(レイアウト:パネル)に、カスタム投稿で入力している項目を表示したい
shiさん
くわしくありがとうございます。
概ね以下のコードをmy-snow-monkey.phpに追加していただければ、ご希望の表示はできると思います。(もっと良いコードの書き方はあると思いますので参考までに(^^;)使用している
get_field()の部分は、設定しているフィールド名に変更してください。
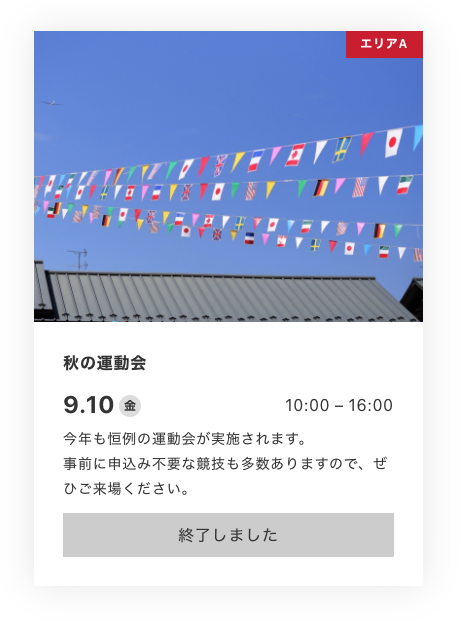
また不要なものは消してください。add_filter( 'snow_monkey_template_part_render_template-parts/loop/entry-summary', function( $html ) { if ( 'event' === get_post_type() ): ob_start(); ?> <?php // カスタムフィールド:開催日 → event_day // ACF デイトピッカー(返り値:Ymd) $eDate = get_post_meta( get_the_ID(), 'event_day', true ); $date = date_create( $eDate ); // 曜日用 $week = array("日", "月", "火", "水", "木", "金", "土"); // 開催日の表示は 「月.日」に変更 $eventDay = date_format($date,'n.j'); $today = wp_date('Ymd'); // カスタムフィールド:開始時刻 → event_starttime // ACF Time Picker(返り値:G:i) $startTime = get_field( 'event_starttime' ); // カスタムフィールド:開始時刻 → event_endtime // ACF Time Picker(返り値:G:i) $endTime = get_field( 'event_endtime' ); // 開催日以降の判定 // 開催日よりも今日の日付が大きい場合 $preriod = strtotime($eDate) < strtotime($today); // カスタムフィールド:概要欄 → event_txt // ACF テキストエリア(改行:なにもしない) $eventSummary = get_field( 'event_txt' ) ?> <div class="event_day_post"> <p class="event_date"><?php echo esc_attr( $eventDay) ; ?><span class="week"><?php echo esc_attr( $week[(int)date_format($date,'w')] ) ?></span></p> <p class="event_time"><?php echo esc_attr( $startTime ) ; ?> - <?php echo esc_attr( $endTime ) ; ?></p> </div> <div class="event_txt"> <p><?php echo nl2br( esc_attr( $eventSummary ) ); ?></p> </div> <?php if( $preriod ): ?> // 開催日以降の条件分岐 <div class="event_finish">終了しました</div> <?php else: ?> <div class="event_open">これから開催です</div> <?php endif; ?> <?php $event = ob_get_clean(); return str_replace( '</header>', '</header>'.$event , // 投稿タイトルの下に追加 $html ); endif; return $html; } );結果 ↓
 ♥ 4Who liked:2021年8月24日 12:23 PM #85240
返信が含まれるトピック: 最新の投稿ブロックのテキストをカスタムフィールドで表示したい
市岡歩夢さん、こんにちは。
ほかにも方法はあるかと思いますが、こちらでご希望のことができると思います。
カスタム投稿タイプ名は
member。
Advanced Custom Fieldsのカスタムフィールド(設定)は- カスタムフィールド名:spec
- フィールドタイプ:テキストエリア
- 改行:なにもしない
投稿画面でのカスタムフィールドの入力は
選手経歴______________
出身地_________________
ポジション___________
一言____________
と、改行しています。
これらを前提として、my-snow-monkey.phpに以下を追記/** * 【最近の投稿】(シンプル)投稿タイプ「メンバー」のみカスタムフィールド"spec"を表示 */ add_filter( 'snow_monkey_template_part_render_template-parts/loop/entry-summary/content/content', function ( $html ) { if ( 'post' == $post_type ) { return $html; } if ( 'member' == get_post_type() ) { return sprintf( '<div class="c-entry-summary__content">%1$s</div>', nl2br( esc_html( get_field( 'spec' ) ) ) ); } return $html; }, 10, 4 ); /** * CPT"member"のシングルページにカスタムフィールド"spec"を表示 */ add_action( 'snow_monkey_prepend_entry_content', function() { if ( is_single() && 'member' === get_post_type() ) { ?> <div class="member_spec"> <p><?php echo nl2br( esc_html( get_field( 'spec' ) ) ); ?></p> </div> <?php } } );これでどうでしょうか?
お試しください。♥ 5Who liked:
2021年8月22日 4:52 PM #85082【お使いの Snow Monkey のバージョン】バージョン: 15.3.5
【お使いの Snow Monkey Blocks のバージョン】12.1.0
【お使いの Snow Monkey Editor のバージョン】6.0.0
【お使いのブラウザ】Chrome
【当該サイトのURL】 ローカル以下の記事を参考にし、一覧ページにカスタムフィールドを反映させる設定を進めております。
記事内のコードにて、投稿文(c-entry-summary__content)を単一のカスタムフィールドで置き換えることはできましたが、
この投稿文を複数のカスタムフィールドで置き換える方法はありますでしょうか。
以上、ご教示のほど宜しくお願い致します。add_filter(
‘snow_monkey_template_part_render’,
function( $html, $slug, $name, $vars ) {
if ( ‘投稿タイプ名’ !== get_post_type() ) {
return $html;
}if ( ‘template-parts/loop/entry-summary/content/content’ === $slug ) {
return sprintf(
‘<div class=”c-entry-summary__content”>%1$s</div>’,
esc_html( get_post_meta( get_the_ID(), ‘カスタムフィールド名A’, true ) )
);
}return $html;
},
10,
42021年7月30日 11:18 PM #82658返信が含まれるトピック: 特定のカスタム投稿タイプのアーカイブページで、投稿一覧にタグ・ディスクリプションを表示させたい。
名前と得意分野で、それぞれコードを分けて以下のような感じでどうでしょうか?
/**
 * カスタム投稿タイプのアーカイブページにて、投稿一覧(リッチメディア型)のタイトルの前に、'名前:'を表示
 *
 * @param string $html はコンテンツの中身.
 */
add_filter(
	'snow_monkey_template_part_render_template-parts/loop/entry-summary/title/title',
	function ( $html ) {
		if ( 'banso-mate' !== get_post_type() ) {
			return $html;
		}
		$html = str_replace( '<h3>', '<h3>名前:', $html );
		return $html;
	}
);

/**
 * カスタム投稿タイプのアーカイブページにて、投稿一覧(リッチメディア型)に、タグ・ディスクリプションを表示
 *
 * @param string $html はコンテンツの中身.
 */
add_filter(
	'snow_monkey_template_part_render_template-parts/loop/entry-summary/content/content',
	function ( $html ) {
		if ( 'banso-mate' !== get_post_type() ) {
			return $html;
		}
		$postid     = get_the_ID();
		$taxonomy   = 'banso_tags';
		$post_terms = get_the_terms( $postid, $taxonomy );
		if ( ! empty( $post_terms ) ) {
			$tags = '<div>';
			$tags .= '<h3>得意分野:</h3>';
			$tags .= '<div>';
			$tags .= '<ul class="smb-taxonomy-terms__list">';
			foreach ( $post_terms as $post_term ) {
				$term_name = $post_term->name;
				$tags .= '<li class="smb-taxonomy-terms__item">' . $term_name . '</li>';
			}
			$tags .= '</div>';
			$tags .= '</div>';
		}

		$meta_description = get_post_meta( get_the_ID(), 'wp-seo-meta-description', true );
		$html = $tags . '<div class="c-entry-summary__content">' .$meta_description. '</div>';
		return $html;
	}
);
♥ 4Who liked:
2021年7月5日 3:15 PM #80090返信が含まれるトピック: カスタム投稿タイプの関連記事で、投稿タイプの判別をしたい。
ありがとうございます。
get_post_type()に変更で、うまくいきました。/** * 各投稿一覧で taxonomy のラベルをタイトルの上に表示 * * @param string $html はコンテンツの中身. */ add_filter( 'snow_monkey_template_part_render_template-parts/loop/entry-summary/title/title', function ( $html ) { $taxonomy = 'category'; $post_type = get_post_type(); switch ( $post_type ) { case 'post': $taxonomy = 'category'; break; case 'news': $taxonomy = 'news_category'; break; case 'shop-info': $taxonomy = 'shop_genre'; break; case 'interview': $taxonomy = ''; break; } $tags = ''; $postid = get_the_ID(); $post_terms = get_the_terms( $postid, $taxonomy ); if ( ! empty( $post_terms ) ) { $tags = '<ul class="' .$taxonomy. '-tags taxonomy-tags">'; foreach ( $post_terms as $post_term ) { $term_name = $post_term->name; $slug = $post_term->slug; $term_id = $post_term->term_id; $tags .= '<li class="' .$taxonomy. '-' .$term_id.' ' .$slug.'">' . $term_name . '</li>'; } $tags .= '</ul>'; } $html = str_replace( '<h3', $tags . '<h3', $html ); return $html; } );♥ 4Who liked:
2021年6月29日 11:31 AM #79584ひとまず簡単な方法として、画像を表示しているattachment.phpをiframeをポップアップさせる方法です。
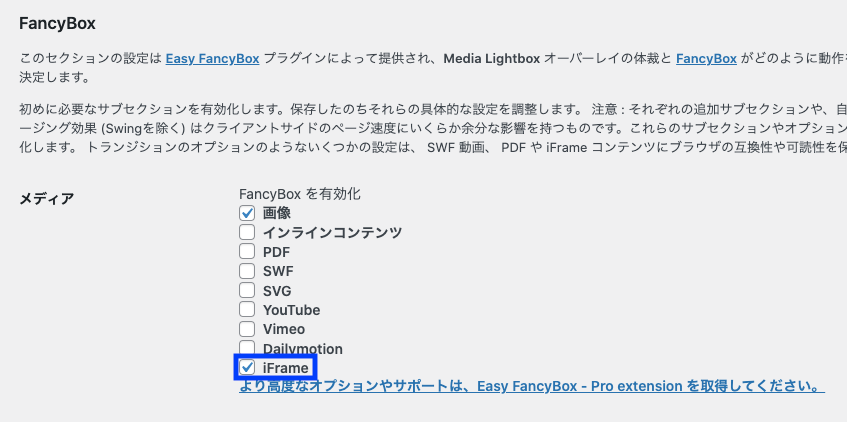
Easy Fancyboxプラグインを使用している場合になりますが、左メニュー【設定】内の【メディア】を開くと、下部にEasy Fancyboxの各種設定項目がありますので、iFrameにもチェックを入れ【変更を保存】を押してください。
次に前回ご提示したコード
<a target="_blank" rel="noreferrer noopener"を<a class="fancybox-iframe"に(以下のように)変更します。my-snow-monkey.phpに記述
add_filter(
	'snow_monkey_template_part_render_template-parts/loop/entry-summary',
	function( $html ) {
		if ( is_search() ) {
			$html = str_replace(
				'<a',
				'<a class="fancybox-iframe"',
			$html
			);
		}
		return $html;
	}
);
これで、検索結果ページの投稿をクリックすると、新しいタブで開くのではなく、ポップアップ(Fancybox)で開くようになると思います。
一度お試しください。♥ 3Who liked:
2021年6月27日 11:02 PM #79441お世話になります。
以下のように、追記したら別タブ表示になりました。
ありがとうございます。add_filter( 'snow_monkey_template_part_render_template-parts/loop/entry-summary', function( $html ) { if ( is_search() ) { // 検索結果ページのみ // $html = str_replace( // '<a', // '<a class="fancybox image"', $html = str_replace( '<a', '<a target="_blank" rel="noreferrer noopener"', $html ); } return $html; } );♥ 1Who liked:
2021年6月27日 2:34 PM #79405お試しいただけるようで良かったです。
snow_monkey_template_part_renderは、こちらや
こちら
で解説されているように、テンプレート内容を書き換えることのできるフィルターフックです。
snow_monkey_template_part_render_以降のtemplate-parts/loop/entry-summaryは、下に記載したとおり、テーマ内の特定のテンプレートファイル(今回はentry-summary.php)を指しています。テーマ「Snow Monkey」
snow-monkey
└template-parts
 └loop
  └entry-summary.php
この
entry-summary.phpの<a href="<?php the_permalink(); ?>">に、target="_blank" rel="noreferrer noopener"を追加する方法になります。また、ご質問の見出し
サイト内検索の検索フォームの画像で検索されたものをクリックした時別タブで表示
とのことでしたので、検索結果ページ(
is_search())にのみ作用するようにします。
例えば、この検索結果ページ以下のコードをmy-snow-monkey.phpに追記することで、お望みの動作になるとは思います。
ただ、提示しておいて言うのも無責任ですが、適切なコードでないかもしれませんので、ご理解いただいたうえでお試しください。add_filter( 'snow_monkey_template_part_render_template-parts/loop/entry-summary', function( $html ) { if ( is_search() ) { // 検索結果ページのみ $html = str_replace( '<a', '<a target="_blank" rel="noreferrer noopener"', $html ); } return $html; } );なお、ほかのページにある画像の拡大は、ソースコードを拝見したところ、Easy FancyBoxプラグインによるポップアップ形式になっているようなので、同じ動作をさせる場合には、上記コードの該当箇所を
$html = str_replace(
	'<a',
	'<a class="fancybox image"',
としてあげると同じ表現になるような気がします。
※こちらは未検証です。以上となりますが、まずは一度お試しください。
♥ 3Who liked:
2021年6月21日 11:46 AM #78882返信が含まれるトピック: 投稿記事一覧に表示させた更新日に、アイコンも表示させたい
あ、そうか失礼しました。追加したコードで強制的に更新日が追加されるからですね。
add_filter(
	'snow_monkey_template_part_render_template-parts/loop/entry-summary/meta/meta',
	function( $html ) {
		// 更新日と公開日が同じ、あるいは更新日より公開日が新しい場合は更新日を追加しない
		if ( get_the_time( 'Ymd' ) >= get_the_modified_time( 'Ymd' ) ) {
			return $html;
		}

		ob_start();
		?>
		<li class="c-meta__item c-meta__item--modified">
			<i class="fas fa-sync-alt" aria-hidden="true"></i>
				<?php
				$date_format = get_option( 'date_format' );
				the_modified_time( $date_format );
				?>
			</li>
		<?php
		$modified = ob_get_clean();
		return preg_replace(
			'|(<li class="c-meta__item c-meta__item--published">.*?</li>)|ms',
			'$1' . $modified,
			$html
		);
	}
);
♥ 1Who liked:2021年6月20日 2:56 PM #78800返信が含まれるトピック: 投稿記事一覧に表示させた更新日に、アイコンも表示させたい
キタジマさん、
該当部分を教えていただいたコードに変えて、My Snow Monkeyに追記して無事出来ました、ありがとうございました。
add_filter(
	'snow_monkey_template_part_render_template-parts/loop/entry-summary/meta/meta',
	function( $html ) {
		ob_start();
		?>
		<li class="c-meta__item c-meta__item--modified">
			<i class="fas fa-sync-alt" aria-hidden="true"></i>
				<?php
				$date_format = get_option( 'date_format' );
				the_modified_time( $date_format );
				?>
			</li>
		<?php
		$modified = ob_get_clean();
		return preg_replace(
			'|(<li class="c-meta__item c-meta__item--published">.*?</li>)|ms',
			'$1' . $modified,
			$html
		);
	}
);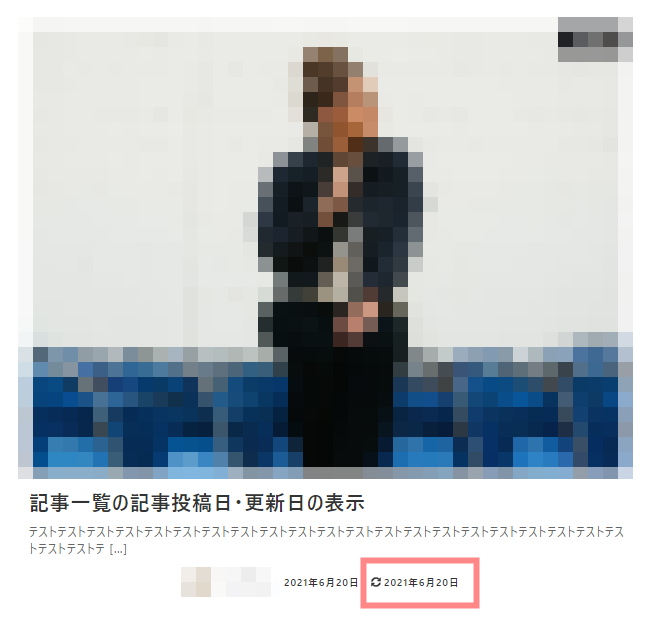
投稿日と更新日を切り分けて表示させるルールがないので、記事更新をしていないくても強制的に更新日が表示されるので、その点理解して使用してみます。
♥ 0Who liked: No user -
投稿者検索結果
Search results of "entry-summary $html"
-
検索結果
-
【お使いの Snow Monkey のバージョン】17.1.0
【お使いの Snow Monkey Blocks のバージョン】16.0.1
【お使いの Snow Monkey Editor のバージョン】8.0.1
【お使いのブラウザ】firefox
【当該サイトのURL】local### 実現したいこと
①任意のタクソノミーで表示されているc-entry-summary__title部分にカスタムフィールドを表示させたい。
②カスタム投稿のアーカイブページの横一列の表示数を3つから4つに変更したい。
できれば任意のタクソノミー投稿の表示数も3つから4つに変更したい。### 発生している問題
①カスタム投稿のアーカイブページではカスタムフィールドの出力が行えたが、任意のタクソノミーで表示されているパネル?には同じようにカスタムフィールドを表示させることができない。
②どこを弄っていいかわからない。
### 試したこと
/*カスタム投稿 */ add_filter( 'snow_monkey_template_part_render_template-parts/loop/entry-summary/title/title', function ($html) { if (get_post_type('seles_cats')) { // カスタムフィールドで設定したフィールド名を代入 $acf_year = get_field('sex'); $acf_faculty = get_field('price'); $acf_birthday = get_field('birthday'); // テンプレートのh2タグの後に<div class='employee-info'>を追加 $acf_employee_info = "</h2> <div class='employee-info'> <p>" . esc_attr($acf_year) . "</p>" . "<p>" . esc_attr($acf_faculty) . "</p>" . "<p>" . esc_attr($acf_birthday) . "</p>" . "</div>"; // テンプレートパーツのh2タグの後ろにdivタグを追加する $html = str_replace( '</h2>', $acf_employee_info, $html ); } return $html; } );アーカイブの時は
is_post_type_archiveを指定することで表示できたので、ここをget_post_typeに変更したが表示されなかった。こちらも参考にしましたが、表示ができませんでした。
↓アーカイブページ
↓任意のタクソノミー表示
よろしくお願いします。
【お使いの Snow Monkey のバージョン】バージョン: 15.3.5
【お使いの Snow Monkey Blocks のバージョン】12.1.0
【お使いの Snow Monkey Editor のバージョン】6.0.0
【お使いのブラウザ】Chrome
【当該サイトのURL】 ローカル以下の記事を参考にし、一覧ページにカスタムフィールドを反映させる設定を進めております。
記事内のコードにて、投稿文(c-entry-summary__content)を単一のカスタムフィールドで置き換えることはできましたが、
この投稿文を複数のカスタムフィールドで置き換える方法はありますでしょうか。
以上、ご教示のほど宜しくお願い致します。add_filter(
‘snow_monkey_template_part_render’,
function( $html, $slug, $name, $vars ) {
if ( ‘投稿タイプ名’ !== get_post_type() ) {
return $html;
}if ( ‘template-parts/loop/entry-summary/content/content’ === $slug ) {
return sprintf(
‘<div class=”c-entry-summary__content”>%1$s</div>’,
esc_html( get_post_meta( get_the_ID(), ‘カスタムフィールド名A’, true ) )
);
}return $html;
},
10,
4